This article will instruct you on repositioning wheel positions on inline skates with 3 or 4 wheels. Typically, the front and rear wheels degrade more quickly than the central ones, and the wear differs between the right and left skates. By rearranging the wheel positions correctly, you can boost performance and prolong the wheels' lifespan.
The instructions given here serve as pointers. They are basic yet efficient for preserving a flat wheel arrangement while extending the life of your wheels. There are multiple techniques for wheel repositioning on inline skates, and as you progress, you may develop your own methods based on your style and expertise.
Overview
Repositioning Wheels on 4-Wheel Inline Skates

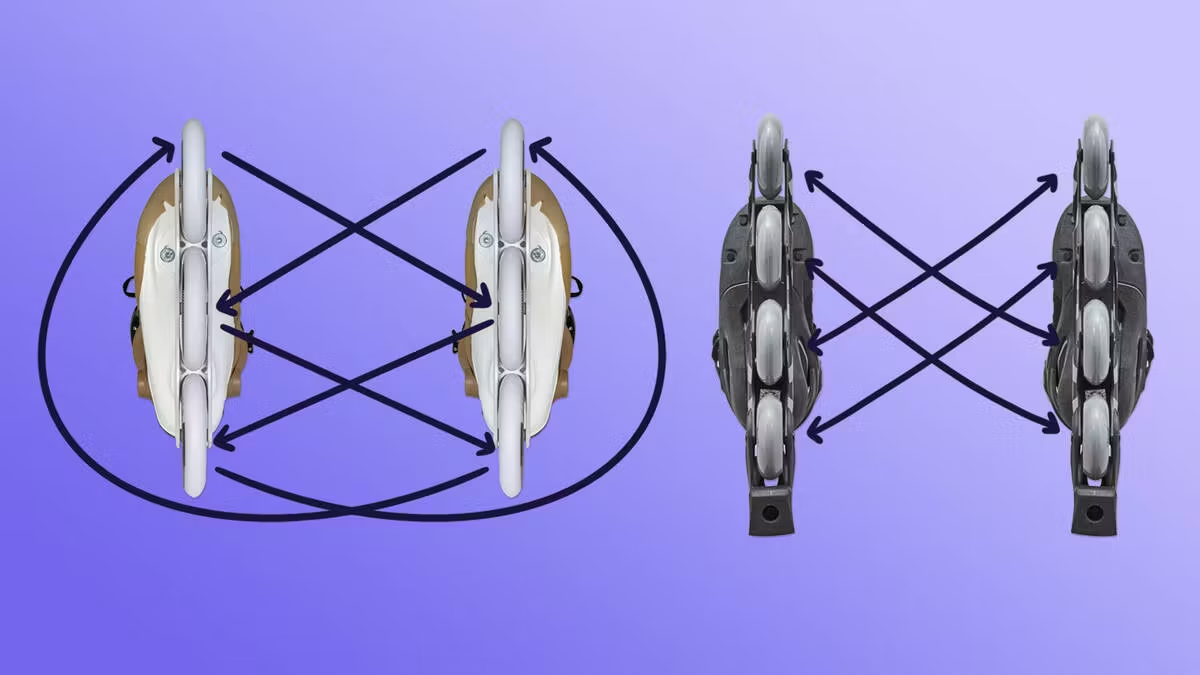
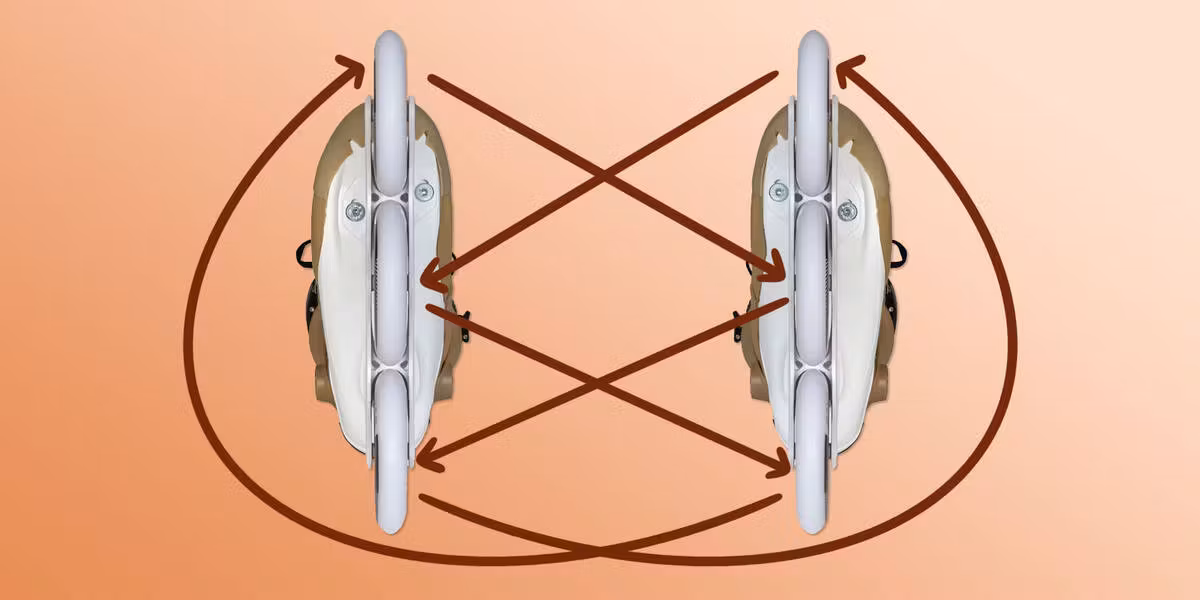
The typical approach for changing wheel positions on 4-wheel inline skates includes exchanging the two rear wheels from one skate with the two front wheels from the other skate as illustrated in the image above.
Utilising a small piece of masking tape on each wheel, you can mark its original location to avoid confusion during the process.
Original wheel placements:
| Left skate | Right skate |
| 1 Left | 1 Right |
| 2 Left | 2 Right |
| 3 Left | 3 Right |
| 4 Left | 4 Right |
Post-rotation wheel placements:
| Left skate | Right skate |
| 3 Right | 3 Left |
| 4 Right | 4 Left |
| 1 Right | 1 Left |
| 2 Right | 2 Left |
- Note: Invert every wheel. If the graphics were outward-facing initially, ensure they face inward after repositioning.
Repositioning Wheels on 3-Wheel Inline Skates
A suitable method for repositioning wheel positions on 3-wheeled inline skates is displayed in the image above. The objective is to achieve uniform wear across all six wheels to enhance their lifespan.
There exist numerous options for adjusting wheel positions on 3-wheeled skates. For those starting with triskates, the following rotation pattern is beneficial.
A small piece of masking tape placed on each wheel, noting its initial position, will help you avoid errors.
Original wheel placements:
| Left skate | Right skate |
| 1 Left | 1 Right |
| 2 Left | 2 Right |
| 3 Left | 3 Right |
Post-rotation wheel placements:
| Left skate | Right skate |
| 3 Right | 3 Left |
| 1 Right | 1 Left |
| 2 Right | 2 Left |
- Note: Invert every wheel. If the graphics were outward-facing initially, ensure they face inward after repositioning.
Necessary Tools for Inline Skate Wheel Repositioning
A 4 mm Allen key or Torx tool is required for the removal and remounting of wheels. Generally, two keys are needed – one for each side of the wheel – to hold both the female and male sides of the wheel bolts during this operation.
Skate tools are greatly useful for repositioning inline skate wheels, as they commonly possess everything needed to assemble and disassemble your skates. Check this out:
Discover how to remove inline wheels in this guide:
Frequency of Wheel Repositioning on Inline Skates
The need for wheel rotation is influenced by how regularly you skate, the conditions of the surfaces, and your skating style.
You'll recognise it's time to adjust your wheels when the centreline begins to deviate from the middle. Some skaters may find it necessary to rotate their wheels every single session, whereas others might only need to do it a few times each season.
Once familiar with the process, wheel repositioning takes merely five minutes.
If you are uncertain about whether to replace your wheels or purchase new skates, refer to the following guide: